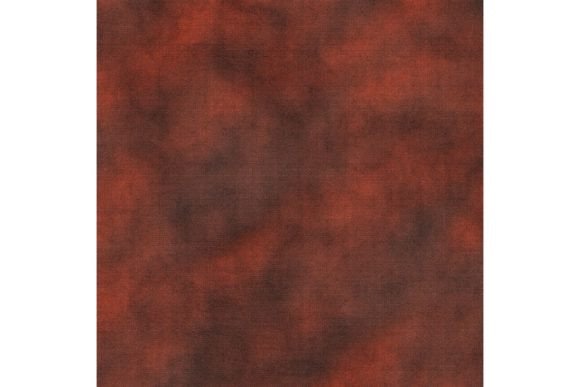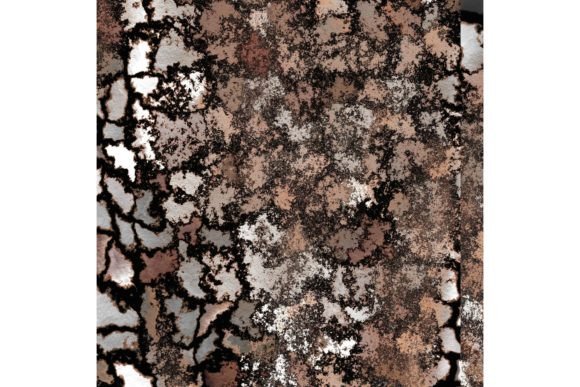
Background 426: A Versatile Abstract Gradient Asset for Creative and Professional Workflows
When you are building a project—whether it is a digital publication, a handmade card, or a branded social media template—the foundation often starts with the right background. Background 426 offers a distinctive abstract design built on a gradient of black, white, and brown tones. At 12 x 12 inches (30.5 x 30.5 cm) with a resolution of 300 dpi and a 3600 x 3600 pixel JPG file, this asset is purpose-built for a wide range of creative and commercial applications. More than a simple graphic, it is a resource that can be incorporated into planning, execution, and final output across many disciplines.
Understanding Background 426 as a Process Asset
Background 426 is not a standalone piece of art to be left untouched. It is a design element that interacts with other tools, assets, and decisions throughout a project lifecycle. Whether you are a freelance designer, a small business owner producing stationery, or an educator preparing classroom materials, this background can function as a consistent visual anchor. Its neutral yet dimensional palette—black, white, and brown gradients—makes it flexible enough for both bold and subtle compositions.
The file specifications matter in practical terms. A 300 dpi resolution ensures sharp prints when used in physical products such as book covers, posters, or scrapbook pages. The square 12x12 format is standard for many crafting and publishing workflows, particularly for album covers, CD/DVD inserts, and invitation suites. Understanding these parameters allows you to plan your project with confidence, knowing that the background will hold up to both screen display and high-quality printing.
Where Background 426 Fits in a Typical Workflow
You can introduce Background 426 at different stages depending on your process. Some creators prefer to start with the background as a mood-setting anchor, while others add it later to unify disparate design elements. Below are common integration points.
Before the Project: Planning and Preparation
During the planning phase, the background can help define color schemes and visual direction. If you are designing a set of business cards or a wedding invitation collection, drop Background 426 into a mood board or sample layout early. The black, white, and brown gradient offers a neutral base that pairs well with metallic accents, typography, and photographic overlays. By assessing its tones under different lighting conditions (either on screen or in print tests), you can decide whether it works as a primary background or as a subtle texture layer behind other content.
Organizing your digital assets also benefits from clear file metadata. Since Background 426 is a single high-resolution JPG, you can store it in a dedicated "textures" or "backgrounds" folder. Tag it with keywords such as "gradient," "neutral," "abstract," and "12x12" to speed up retrieval during busy production schedules.
During the Creative Process: Implementation and Layering
When you move into active design, Background 426 becomes a foundational layer. For a Photoshop layout, place it as the bottom layer and adjust opacity or blending modes if needed. The gradient nature of the file means it already contains visual depth, so you may not need additional shading. For a Canva project, import the JPG and crop it to your target canvas size—it will fill a standard 12x12 area perfectly, but you can also scale it up or down without noticeable loss because of its high pixel dimensions.
If you are working on a scrapbooking layout, consider printing the background on matte or textured paper. The brown tones can accentuate natural elements like twine or dried flowers, while the black gradients add a modern edge. For digital stationery, test the background with overlaying text to ensure readability. Because the gradients are subtle, you may want to add a semi-transparent shape behind text blocks for contrast.
After the Project: Quality Control and Output
After you have placed your content over Background 426, review the final composition across intended outputs. For a blog banner or social media image, check the appearance on both desktop and mobile displays. The black-white-brown blend can sometimes read differently on various screens—adjust brightness or contrast settings in your export to maintain consistency. For print projects, run a proof on the intended paper stock. The 300 dpi resolution guarantees crisp detail, but the brown gradient may shift slightly depending on the printer’s color profile. Conduct a small test print before committing to a large run of posters or book covers.
Workflow Examples Across Different Roles
One of the strengths of Background 426 is its adaptability to different professional contexts. Here are three realistic implementations.
- Graphic Designer for a Music EP: You need a CD and DVD cover that feels warm yet modern. Import Background 426 into your layout software, set it as the background, and add the artist name in bold white sans-serif type. The brown gradient prevents the cover from feeling too stark, while the black elements ground the design. Export at 300 dpi for the printer—the 12x12 format fits standard jewel case inserts.
- Small Business Owner Creating Stationery: You run a boutique paper goods brand. Use Background 426 as a base for thank-you cards. Print on cream cardstock, overlay a simple handwritten font in dark brown ink, and add a subtle gold foil accent. The gradient gives each card a unique, non-repeatable look despite being the same file, because the print placement can vary across cards.
- Teacher Preparing Classroom Materials: You need a visually engaging background for a poster that explains a historical timeline. Drop Background 426 into a PowerPoint or Publisher file, then add text boxes with a white fill at 50% opacity. The brown tones evoke an aged paper feel without distracting from content. The high resolution means you can print the poster as large as A2 without pixelation.
Practical Tips for Long-Term Use and Organization
To get the most out of Background 426 over time, treat it as a reusable asset rather than a one-off graphic. Because it is a neutral gradient, you can repurpose it for different seasons, themes, and projects simply by changing the elements placed on top. Store the file in a cloud-synced folder so you can access it from multiple devices. If you use design software that supports layer presets, save a project file that already has Background 426 as a locked base layer—this reduces setup time in future projects.
Consider creating variations by adjusting the file in image editing software. You can flip or rotate the background to change the direction of the gradient, or apply a color overlay to tint the brown toward a specific hue. This extends the utility of a single asset, giving you multiple looks without increasing your file library. Consistency in branding is easier to maintain when you start from a familiar foundation.
When collaborating with others, share Background 426 alongside a usage guide. Specify that it is a JPG at 300 dpi, 3600 x 3600 pixels, and intended for both screen and print. Clear communication prevents team members from misusing the file—for example, accidentally resizing it to a lower resolution for a billboard, which would degrade quality.
Factors to Consider for Quality and Compatibility
Before integrating Background 426 into a final product, evaluate a few technical and aesthetic factors.
- Compatibility with design platforms: The JPG format is universally accepted in software like Adobe Creative Suite, Affinity, Canva, Procreate, and even Microsoft Office. No conversion is needed, though you may want to convert to PNG if transparent areas are required (note: JPG does not support transparency, so layer it behind opaque elements).
- Color accuracy across devices: The black, white, and brown gradient may appear slightly different on a glossy screen versus a matte print. Calibrate your monitor or request a printed proof from your print shop. For digital-only use, sRGB color space is recommended for consistent web viewing.
- Print preparation: Ensure your print file uses the correct CMYK or RGB profile depending on the printer. Background 426 as a JPG is likely in RGB; convert to CMYK if your offset printer requires it, but do so before adding text to avoid shifting colors in placed elements.
- Longevity of use: Because trends evolve, a neutral gradient background can remain relevant longer than highly stylized patterns. The brown tones add organic warmth, which suits both vintage and contemporary aesthetics. This makes Background 426 a durable part of your asset library.
Integrating Background 426 with Other Resources
This background works well when paired with layered elements such as geometric overlays, foil textures, or transparent PNGs of floral illustrations. For a scrapbooking page, combine it with a paper texture overlay to add tactility. In a blog banner, use a soft vignette effect on top to draw focus to the center. The gradient provides a natural graduation of light that guides the eye, so you can place your main subject where the black or brown is lightest.
For efficiency, create a few template files that already incorporate Background 426 as a base. For example, a standard invitation template with the background locked and placeholder areas for text and images. Then, when a new client requests a card design, you duplicate the template and swap out the content. This workflow saves time and maintains visual consistency across multiple products.
Final Observations on Practical Implementation
Background 426 is more than a pretty file—it is a building block that can streamline your creative process. By understanding its resolution, format, and tonal range, you can integrate it before, during, and after project stages. Whether you are planning a product line, executing a single item, or reviewing final prints, this asset offers a reliable foundation. Experiment with different blending modes, paper stocks, and overlay elements to discover how it fits your particular use case. Over time, you may find that this one background becomes a go-to starting point for many of your projects, saving you from reinventing the visual wheel each time.