In My Mama Era PNG: A Practical Digital Asset for Creative Workflows
Digital design assets come in many forms, but few balance versatility with ready-to-use quality as well as a well-prepared PNG file. The In My Mama Era PNG is one such asset, offering a transparent-background design at 300 dpi and 4500×4500 px resolution. Whether you are producing merchandise, creating custom gifts, or building a product line, this file fits into a practical, repeatable workflow that saves time and improves output consistency.
Understanding the File and Its Specifications
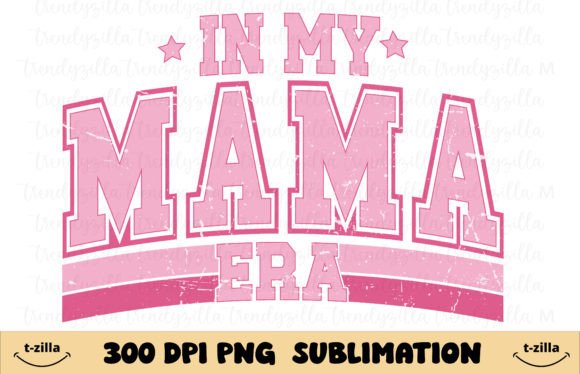
The In My Mama Era PNG is a single digital file featuring a phrase-based design commonly used in lifestyle and apparel products. The phrase itself suggests a celebratory or reflective theme, which makes it suitable for a range of personal and commercial projects. The technical specs matter just as much as the visual content. A 300 dpi resolution at 4500×4500 pixels means the image holds up well at large print sizes and retains crisp edges when scaled down. The transparent background eliminates the need for manual removal work, so you can drop the design directly onto any colored surface or layered composition. This file is delivered without watermarks, making it production-ready from the moment you download it.
Where In My Mama Era PNG Fits in a Creative Workflow
Every project follows some kind of process, whether formal or informal. The In My Mama Era PNG is best understood as a mid-stage asset: it arrives after the conceptual and design phase but before the final production run. You do not need to draw the artwork, refine the typography, or test the layout. That work has already been handled. Your role is to integrate it into your chosen medium, adjust sizing and placement, and produce the final physical or digital product. This positioning makes the file especially useful for small business owners, freelance creators, and hobbyists who want to move from idea to finished item without spending hours on graphic creation.
Before Production: Planning and Preparation
Preparation directly affects how smoothly the In My Mama Era PNG will integrate into your workflow. Start by deciding which products you intend to create. The file works well for greeting cards, t-shirts, mugs, tote bags, sweatshirts, hoodies, framed artwork, stickers, scrapbooks, sublimation projects, pillows, and similar items. Each medium has its own size and resolution requirements. Because this PNG already sits at 4500×4500 px, you have enough resolution to print at a large scale or resize without noticeable quality loss. If you are working with a print-on-demand service, check their upload specifications for transparency support and file size limits. If you are printing at home, confirm that your software preserves the alpha channel so the transparent background remains intact.
During the Design and Production Process
Once you have your blank product and the In My Mama Era PNG ready, the actual production work consists of placement, sizing, and output settings. Open your design software of choice, which could be Adobe Photoshop, Illustrator, Affinity Designer, Canva, or even a free tool like GIMP or Photopea. Drag the PNG onto your canvas. Because the background is transparent, you can layer it directly over a colored background, a photo, or another graphic element. Adjust the position using center guides or manual alignment. For garments like t-shirts and hoodies, a centered chest placement is standard, but the design also works well as a small left-chest accent or a larger back print. For mugs and sublimation items, wrap the design around the curved surface using your software's distortion or warp tools if needed. Resize the image as necessary, keeping in mind that scaling down is always safer than scaling up beyond the original dimensions.
After Completion: Quality Control and Long-Term Use
After you export your final production file, run a quick quality check. Zoom in to 100% or higher to verify that the edges are smooth and that the transparent background has not introduced any unwanted artifacts. If you are printing on fabric, confirm that the colors match your intended palette, as some materials can shift hues slightly. For digital products like stickers or scrapbook elements, test the file on a mockup or a sample print before committing to a large batch. The In My Mama Era PNG can be stored in your asset library and reused across multiple projects. Because it is a single high-resolution file, you can archive it in a folder organized by theme or product line. Tag it with relevant keywords so you can retrieve it quickly later.
Integration with Tools, Platforms, and Other Assets
The In My Mama Era PNG works alongside a variety of tools and resources. Print-on-demand platforms such as Printful, Printify, Redbubble, Teespring, and Zazzle all accept PNG files with transparent backgrounds. You can upload the design directly, set your product mockups, and publish listings without additional editing. For physical craft projects, the file can be imported into cutting machine software like Cricut Design Space or Silhouette Studio. The transparent background makes it easy to cut around the text and design elements without a visible border. If you are combining the PNG with other design assets, such as borders, patterns, or additional text, keep your layer stack organized. Name each layer clearly and group related elements. This practice makes it easier to adjust individual components later without disrupting the entire composition.
For a small business owner launching a product line
You have decided to sell t-shirts and tote bags featuring the In My Mama Era design. Start by uploading the PNG to your print-on-demand dashboard. Set each product variant with the design centered. Use the platform's mockup generator to preview the items on different colors. Once listings are live, the same file can be repurposed for social media graphics by placing it on a branded background. Your total active time per product is under 15 minutes, and the file stays in your assets for future reorders or new product types.
For a craft hobbyist creating gifts
You want to make a set of personalized mugs and a scrapbook page for a friend. Open your design software, place the In My Mama Era PNG on a mug template, and adjust the wrap. Export the file as a PNG for sublimation printing. For the scrapbook page, resize the PNG to a smaller scale and layer it over patterned paper. Print both items at home or through a local print shop. The entire session uses one source file for two distinct outputs.
For a freelancer fulfilling client orders
A client requests a batch of custom hoodies with the In My Mama Era design. You download the file, import it into your production software, and align it with the hoodie mockup. After the client approves the preview, you produce the print file with the correct color profile and dimensions. Because the PNG is already high-resolution and transparent, you skip the usual step of background removal and resolution checking. This shaves off 10 to 20 minutes per design.
Practical Implementation Tips
Keep a backup copy of the In My Mama Era PNG in a separate location, such as cloud storage or an external drive. If you plan to use the design repeatedly, consider creating a template file for each product type. For example, save a t-shirt template with the PNG already placed and sized. That way, you only need to update the base product color for each new order. When exporting, always select PNG format with transparency enabled. Avoid JPEG exports because they will add a solid white background and degrade the asset's usefulness. If you need a smaller file for web use, export a separate low-resolution copy rather than compressing the original. This preserves the full-quality version for print projects. Finally, test one sample product before scaling up production. Even a quick print on plain paper or a single sticker can reveal alignment or color issues that would be costly in a large batch.
Organizing for Efficiency and Consistency
Over time, you may accumulate multiple digital assets. A consistent file naming convention helps you locate the In My Mama Era PNG quickly. Use a format that includes the theme, resolution, and date, such as In-My-Mama-Era_4500x4500_300dpi_2025.png. Store it in a folder labeled by collection or project type. If you share files with a team, set access permissions so that the original version is not accidentally overwritten. When you use the file across different platforms, keep a log of which products and colors you have published. This prevents duplicate listings and makes it easier to track which items are performing well.
Long-Term Use and Iteration
The In My Mama Era PNG is not a one-time asset. Trends change, and the same design can be refreshed by pairing it with new backgrounds, fonts, or layouts. A year after your first product launch, you can revisit the file and combine it with other elements to create a series. Because the original design is high-resolution and unmarked, you retain full control over its presentation. If you ever need to update the phrase or adapt it for a different audience, the file serves as a reference for typography and sizing. Treat it as a foundational piece in your asset library rather than a single-use download.
By understanding the specifications, planning your integration, and following a clear production workflow, the In My Mama Era PNG becomes a reliable tool that fits naturally into your creative or business process. It eliminates low-value preparation work, maintains quality across multiple outputs, and stays useful long after the first print. For anyone regularly producing physical or digital products, this file offers a straightforward path from concept to finished result.