Brother of the Groom SVG Design – What You Need to Know Before You Buy and Use It
When you are tasked with creating something special for a wedding, the Brother of the Groom SVG Design can be a perfect starting point. Whether you are making matching t-shirts for the rehearsal dinner, a personalized tumbler for the wedding party, or a framed keepsake for the family, this design is versatile and meaningful. But before you download and start cutting, there are several details that can make or break your project. Many people assume that buying a digital file is as simple as clicking “purchase,” but the reality is that understanding what you actually get, how to use it, and where people commonly go wrong will save you time, frustration, and wasted material.
This article walks you through the most common mistakes people make with Brother of the Groom SVG files, what to check before you open your software, and how to get professional-quality results every time.
Mistake One – Thinking You Are Buying a Physical Product
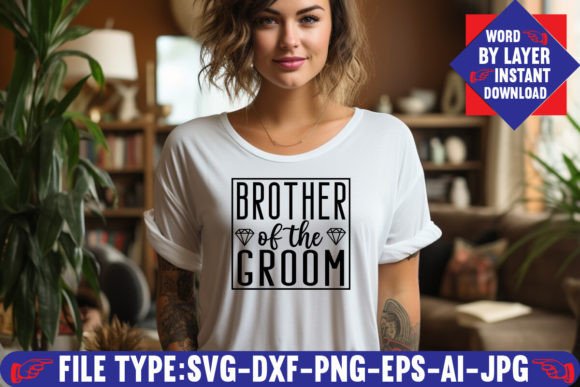
One of the most frequent misunderstandings is that the SVG file itself is a physical item. The product you purchase is a digital download only. Your download comes as one .zip file, and inside that zip file you will find six individual files: one Adobe Illustrator (AI) source file, one SVG file that is specifically built layer by layer for cutting machines, one PNG file at 300 DPI with a transparent background, one EPS editable vector file, one DXF file, and one JPEG file. There is no shirt, no sticker, no mug, and no card included. What you are buying is the design file that you then use to create your own physical items. This is a critical distinction because people often expect a finished product. If you are a beginner, make sure you have the means to unzip the folder and transfer the file to your cutting machine software. Forgetting this step can lead to confusion when you open your downloads folder and see a single .zip file instead of a ready-to-cut design.
To avoid this, always plan your project around the fact that you need to supply the materials, the printer or vinyl, and the cutting machine. The digital files are the blueprint, not the finished house. If you are a small business owner or a hobbyist, treat the download as a template that you can customize and reproduce.
Mistake Two – Ignoring File Format Compatibility
Another common error is assuming that every file format works the same way on every machine. The Brother of the Groom SVG Design comes with multiple formats for a reason, but if you use the wrong one or skip the readme instructions, your cut lines may not align, or your machine may reject the file entirely. Here is a breakdown of what each format is for and where people misuse them:
- SVG file: This is the word-by-layer SVG cut file, designed specifically for cutting machines like Cricut and Silhouette. It keeps each layer separate so you can assign different colors and cut each piece individually. Do not try to open this file in a basic photo viewer and expect it to work.
- AI file: This is the Adobe Illustrator source file. If you want to edit the design, change colors, or rearrange layers, this is your best option. Beginners sometimes open this file by mistake and wonder why their cutting software cannot read it properly.
- EPS and DXF files: These are vector formats that work across many platforms, including Inkscape and some older cutting machine software. They are great for compatibility but may require you to re-layer the design if the software flattens it.
- PNG and JPEG files: The PNG is high-resolution at 300 DPI with a transparent background, perfect for printing or previewing. The JPEG is a standard image file. Neither is suitable for cutting. People sometimes try to upload the JPEG to their Cricut and are frustrated when they cannot separate the layers.
Your best approach is to use the SVG file for cutting and keep the AI file as a backup for edits. If you are using Silhouette Studio, test the SVG first. If you are using Cricut Design Space, upload the SVG directly and check that each layer appears as an individual cut line. Taking two minutes to verify the file type before you start will prevent the headache of wasted vinyl or misaligned pressing.
Mistake Three – Misunderstanding What “Word by Layer” Means
The phrase “word by layer” is central to this design, but many people assume it just means the file is organized. In reality, it means that each word or phrase in the design is on its own separate layer. For a Brother of the Groom SVG, that could mean one layer for “Brother,” another layer for “of the,” and another for “Groom,” or it could mean individual letters or decorative elements are isolated. The advantage is that you can apply different colors, materials, or textures to each word. For example, you could cut “Brother” in gold foil and “Groom” in matte black. The common mistake is to treat the entire design as one piece and try to cut it all at once without checking the layer structure.
When you open the file in your cutting software, look at the layer panel. If the design has more than one layer, you need to decide whether to keep them grouped or separate them. Beginners often accidentally merge all layers into one, losing the ability to color each word differently. Advanced users sometimes over-complicate the layering and add unnecessary steps. The best practice is to preview the file in your software before loading any material. Count the layers, rename them according to the word they represent, and assign colors that match your vinyl or HTV. This simple organizational step saves time during cutting and weeding.
For small business owners and entrepreneurs, mastering the layer structure lets you offer customized variations. You can sell the same design in different color combinations without editing the file each time. For hobbyists, it means you can make one project with a unified look or swap out colors based on the wedding theme.
Mistake Four – Overlooking Quality Checks Before Cutting
Digital files are not immune to quality issues. Even a well-designed SVG can have overlapping paths, stray anchor points, or non-closed shapes that cause your cutting machine to misbehave. People sometimes assume that because the file is for sale, it is ready to cut without inspection. That is not always the case. After downloading the Brother of the Groom SVG Design, take a moment to check the following:
- Are all paths closed? If a line is open, the machine may not cut it correctly. In software like Inkscape or Illustrator, use the path inspection tools to verify.
- Is the size appropriate? Many SVG files open at a default size that may be too large or too small for your project. Resize it within your cutting software. But be careful: scaling down too much can make thin elements hard to weed, and scaling up too much can reveal pixelation or gaps if the design was not originally vectorized at high quality.
- Is the transparent background truly transparent? The included PNG file has a transparent background, but if you are printing the design instead of cutting it, check that there is no unwanted white box around the text. If there is, you may need to delete a hidden background layer.
A quick check using the software’s outline or wireframe view will reveal any hidden issues. This step is especially important for freelancers and small business owners who cannot afford to waste materials on a flawed cut. If you spot a problem, you can often fix it by using the weld or unify function in your software, or by deleting extra nodes. Do not skip this step even if you have used the design before — file variations exist.
Mistake Five – Choosing the Wrong Material or Application Method
Even with a perfect digital file, the final result depends on how you apply the design. A common oversight is using the same material for every surface without considering the product’s intended use. For a Brother of the Groom shirt that will be worn for hours at a wedding, heat transfer vinyl (HTV) is a good choice, but you need to use a high-quality brand with proper pressure and temperature. If you are making a sign or a decal for a tumbler, adhesive vinyl is appropriate. People sometimes use cheap vinyl that peels after one wash, or they use the wrong heat setting and melt the design. The digital file is neutral; the material and application determine durability.
Before cutting, research the recommended settings for your material. Test on a scrap piece first. For HTV, the time and temperature vary by brand. For adhesive vinyl, the surface must be clean and dry. If you are layering multiple colors, plan the order: cut the bottom layer first, then the top layer, and use transfer tape or a press to align them. The word-by-layer feature of the SVG makes layering easier, but only if you follow a logical sequence. If you try to apply all layers at once, you risk misalignment or bubbles.
Marketers and bloggers who create tutorials or product reviews should emphasize this practical step. It is the difference between a professional-looking product and one that looks homemade in a negative way.
What to Check Before You Purchase
When you are browsing for a Brother of the Groom SVG Design, there are a few things to evaluate before you click “buy.” First, verify that the file includes the formats you actually need. If you only have a Silhouette, make sure the SVG and DXF are included. If you use Adobe Illustrator, confirm that the AI file is layered and editable. Second, check for reviews or sample images that show the design cut and applied. Sellers often display a mockup, but user photos can reveal how the design looks in real life. Third, read the product description carefully. Look for clues about whether the design is “word by layer” or if it is a single-piece SVG. Some sellers use similar language but deliver a flattened file. If in doubt, message the seller before purchasing.
For educators and beginners, it is worth starting with a design that includes clear instructions or a help file. Some creators include a PDF guide on how to unzip and import the files. That extra information can save you a lot of guesswork. And for hobbyists who like to tweak designs, ensure the license allows modifications. Many commercial licenses require a separate purchase if you plan to sell finished products using the design.
Better Approaches for Getting Great Results
Instead of rushing to cut, take a deliberate approach. Open the SVG file in your chosen software and spend a few minutes understanding the layer structure. Use the preview function to simulate the cut. If the design looks correct, cut a small test piece in cardstock or inexpensive vinyl before committing to your final material. This test takes ten minutes and can prevent a ruined project. For small business owners, this test cut is part of your quality control. For freelancers, it is a way to ensure client satisfaction.
Another better approach is to organize your digital files by project. Keep the original .zip file archived, and then extract the files into a folder for that specific project. Rename the SVG to indicate the project name and date. This habit helps when you need to reuse or modify the design later. And if you are selling finished items based on the design, keep a copy of the license in the same folder for easy reference.
Finally, remember that the design is only as good as your execution. Use sharp blades, clean mats, and properly prepared materials. Follow the recommended settings for your specific machine. Whether you are a seasoned crafter or a beginner, these small disciplines elevate your work from average to impressive.
The Brother of the Groom SVG Design is a flexible, meaningful digital resource that can be used for dozens of wedding-related projects. By understanding what you get, avoiding common mistakes, and taking the time to prepare and test, you will create pieces that you are proud to give or sell. The digital download gives you freedom and control — use that advantage wisely.