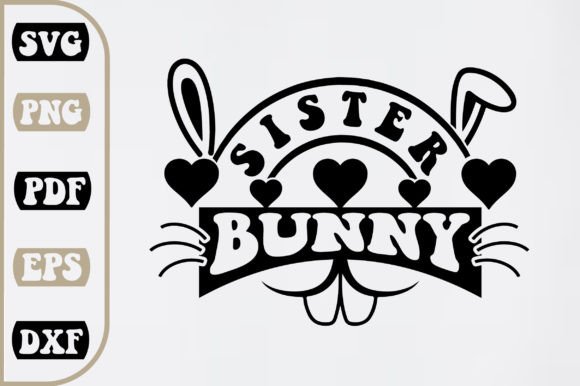
Sister Bunny SVG Design: What Hidden Mistakes Cost You Time and Quality
When you come across Sister Bunny SVG Design in a digital shop, the charming quote artwork and layered bunny motifs are hard to ignore. Many crafters, small business owners, and hobbyists add these files to their cart thinking they will instantly produce perfect shirts, mugs, or wall art. But the truth is that SVG design can trip up even experienced creators if they skip a few critical checks. Below, I walk through the most common mistakes people make with Sister Bunny SVG Design and, more importantly, how you can avoid them to save time, money, and frustration.
Mistake #1: Assuming All SVG Files Are Ready to Cut as Is
A common misunderstanding is that Sister Bunny SVG Design files will work perfectly the moment they are uploaded to a cutting machine. In reality, even a well-made SVG may need layer adjustments, size scaling, or color reassignment depending on your software and material. Many Cricut users, for example, open the file and find that layers are grouped in unexpected ways or that certain elements are set to a color that won’t show up well on their chosen fabric.
What happens next? Wasted vinyl, wasted time, and a project that looks nothing like the preview. Instead of blaming the design, take two minutes to review the layers before cutting. With the Word By Layer SVG Files format, you get one layer per color or per element, so you can safely ungroup and reassign colors without breaking the design. Always do a test cut on scrap material before committing to your final product.
Mistake #2: Overlooking the Importance of File Format Versatility
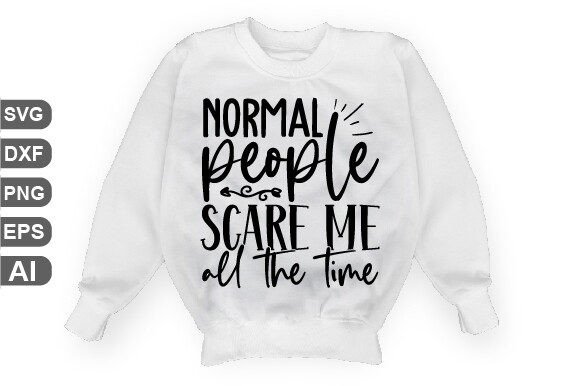
The product description mentions that your download includes SVG, EPS, PNG, DXF, and PDF files. Many beginners stick to the SVG file because it is the most popular for Cricut, but they miss out on the benefits of the other formats. For instance, the EPS file is a vector file that remains fully editable in Adobe Illustrator or Inkscape. If you ever want to change the quote, adjust the bunny ears, or create a mirrored version, the EPS gives you that flexibility without losing resolution.
The PNG file at 300 DPI with a transparent background is perfect for print-on-demand mockups or for printing on paper and cardstock. The DXF file can be imported into AutoCAD or certain laser cutting software if you want to etch the design onto wood or acrylic. By ignoring these extras, you limit your creative potential. Save the entire .zip file and keep all formats handy—you never know when you’ll need them for a different machine or a new project.
Mistake #3: Misjudging the Size and Placement for Different Surfaces
One of the most overlooked details when working with Sister Bunny SVG Design is size scaling for different blanks. A design that looks perfect on a 10-inch laptop sticker can look overwhelming on a coffee mug or underwhelming on a t-shirt back. Many crafters upload the SVG at the default size and cut without scaling it to the actual product dimensions.
For t-shirts, I recommend keeping the design between 8 and 12 inches wide for adult sizes, and for mugs, aim for no more than 4 inches wide so it fits comfortably within the curved surface. For signs and home decor, the size depends on the frame or board you are using. A simple rule of thumb: hold a printed outline of the design against your blank before cutting. This step alone prevents wasted materials and gives you a polished result every time.
Mistake #4: Forgetting to Weed Test Cuts Before Applying
Beginners often cut a full design and then attempt to weed it, only to discover that tiny details—like the letters in a delicate quote or the whiskers on the bunny—are too fragile and tear or lift. The Sister Bunny SVG Design features delightful quotes and intricate elements, which can be especially challenging if you are using a low-quality vinyl or a dull blade.
How to avoid this: Before cutting the entire design, perform a small test cut of the most detailed section. Look at the lettering and the bunny outline. If the vinyl lifts or tears when weeding, consider increasing the blade pressure slightly or using a stronger carrier sheet. Alternatively, if the design has very fine lines, you can simplify it by removing some internal cut lines in your software. Many SVG files allow you to turn off certain layers, so you can keep only the bold parts if needed.
Mistake #5: Ignoring the Compatibility Checks for Your Machine
Not all SVG files work perfectly with every machine. While the description says these files are compatible with Cricut, that does not mean they are automatically compatible with every version of Cricut Design Space, or with all Silhouette, Brother, or heat press machines. Some users report that an SVG file imports as a single merged shape rather than layered elements, because their software interprets the file differently.
Before you buy, check the specific requirements of your cutting software. For Cricut Design Space, ensure you are using a recent version and that you unzip the file before uploading. For Silhouette Studio, the DXF or PNG might work better than SVG. If you are using a laser engraver, the DXF file is usually your safest bet. When in doubt, contact the seller—they can confirm which format is most reliable for your setup. Many high-quality SVG shops provide customer support for exactly this reason.
Mistake #6: Underestimating the Value of Layered Designs for Multi-Color Projects
The Word By Layer SVG Files format is specifically designed for projects where each layer corresponds to a different color or material. Yet many people attempt to use a single-color approach and wonder why the design loses its charm. Sister Bunny SVG Design typically includes multiple layers for the quote, the bunny figure, and various decorative elements. Trying to force everything into one color usually makes the text hard to read and the bunny silhouette less distinct.
Instead, embrace the layering process. Use one color for the main quote, a second color for the bunny outline, and a third for accent elements. This approach works beautifully on shirts, tote bags, and wall art. If you are nervous about alignment, use transfer tape and a hinge method to place each layer accurately. The extra effort pays off in a professional, multi-dimensional look that sells well at craft fairs or on Etsy.
Mistake #7: Treating the Design as a One-Trick Pony
Many buyers download Sister Bunny SVG Design for a single project—say, a birthday gift or a seasonal shirt—and then forget about the file. This is a missed opportunity. The design can be used across shirts, mugs, signs, cards, home decor, clothing, stationery, and wall art as listed in the product description. By resizing and adapting the file to different surfaces, you get a full product line from one SVG investment.
Small business owners can create a cohesive collection: a matching mug, a tote bag, a greeting card, and a framed print, all using the same Sister Bunny SVG Design. This consistency builds brand recognition and saves you from buying multiple designs. For hobbyists, it means you can use the file for your own home decorations and also make gifts for friends without purchasing new files every time.
What to Check Before You Click Download
Before you buy or use any Sister Bunny SVG Design, take a moment to verify three things:
- File format availability: Does the bundle include SVG, EPS, PNG, DXF, and PDF? The more formats, the more machines and projects you can cover.
- Layer structure: Read the product description carefully. The phrase Word By Layer SVG Files indicates that each color or element is on its own layer—perfect for multi-color cuts. If you need a single-layer version for print-then-cut, the PNG file is your friend.
- Commercial use rights: If you plan to sell products made from the design, check the shop’s licensing terms. Many SVG sellers allow small-scale commercial use, but it is always good to confirm so you stay within legal bounds.
A Better Way to Work with Sister Bunny SVG Design
To get the most out of your Sister Bunny SVG Design, start by unzipping the folder and reading any included instructions. Open the SVG in your preferred software and inspect the layers. Rename them according to color and placement, so you do not get confused later. Then, do a test cut on cardstock or inexpensive vinyl before using your premium materials. This habit alone will eliminate most cutting and weeding surprises.
When you apply the design to a shirt, mug, sign, card, or home decoration, use even pressure and a consistent temperature if heat transfer is involved. For stationery and wall art, the PNG file at 300 DPI will give you crisp printing. And if you ever decide to change the quote or resize an element, return to the EPS file in Illustrator—it remains fully editable, so you are never stuck with a design that does not fit your vision.
By paying attention to these details, you elevate your crafting from simply cutting a design to intentionally creating pieces that look professional and last. Sister Bunny SVG Design offers a wonderful foundation, but your care in preparation, format selection, and finishing touches is what makes the end product shine. Whether you are a beginner making your first shirt or a seasoned seller expanding your product line, these small corrections to your workflow will save you time, reduce waste, and improve every project you undertake.